Read this first
Do not start with bloom. Start with a good grayscale mask. If the mask already reads like energy, color and emission will be easy. If the mask is muddy, stronger glow will only make the material messy.
UE5 / Recipe / Emissive Energy
A practical recipe for a glowing spell core: moving noise gives it life, masks give it shape, color remap gives it art direction, and emission sells the energy.
Do not start with bloom. Start with a good grayscale mask. If the mask already reads like energy, color and emission will be easy. If the mask is muddy, stronger glow will only make the material messy.
01
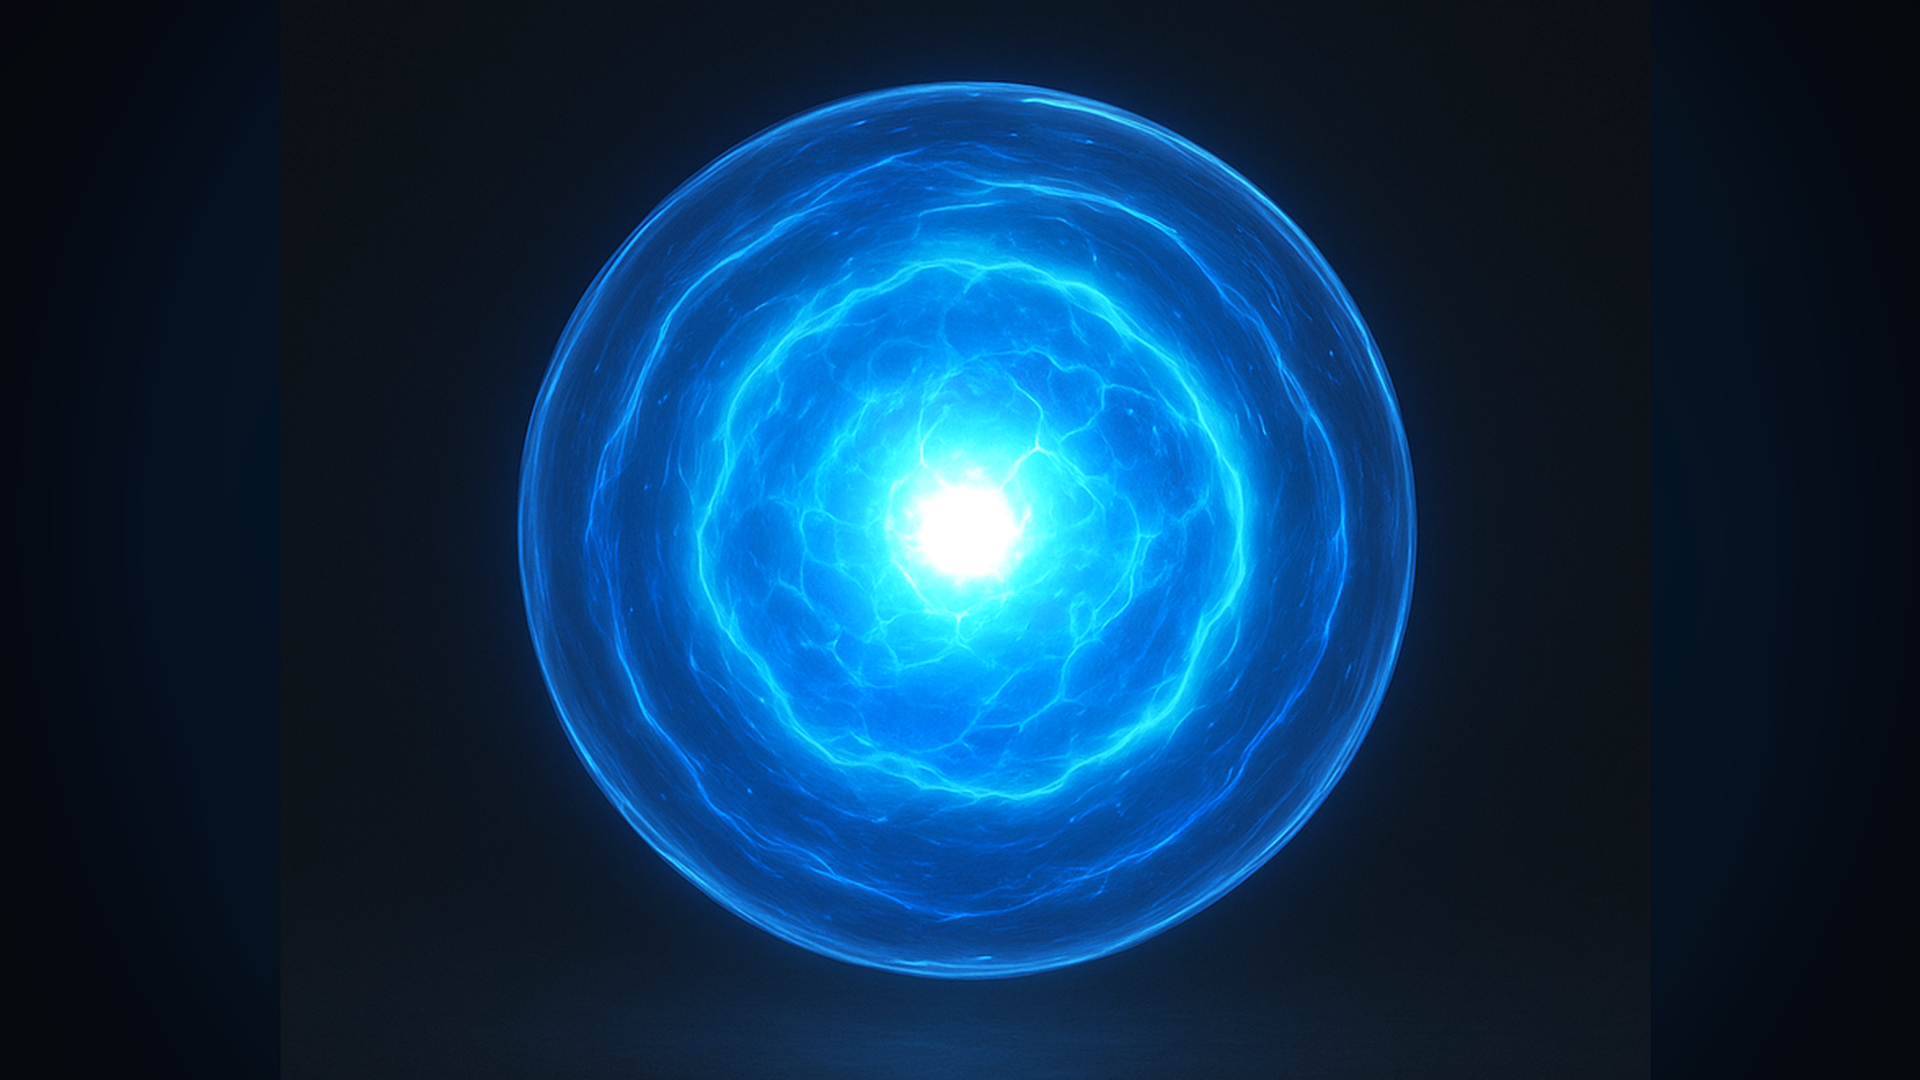
The important read is not just "blue glow". Look for a bright center, darker outer mass, subtle internal motion, and a clean circular falloff.
02
03
Before adding color, preview the mask in black and white. A beginner mistake is to fix a weak mask with stronger emission. It may look bright in isolation, but it will fail in a busy scene.
04
Use a radial mask from UV center or a SphereMask if this sits on geometry. This mask decides where the energy exists. Start soft, then sharpen later with a Power or SmoothStep.
Beginner check: plug this directly into Emissive as grayscale. You should see a clear soft blob before adding noise.
Use one broad, slow noise for large cloudy motion and one smaller, faster noise for sparkle or turbulence. Multiply or add them carefully. Too much noise makes the effect read as static dirt.
Senior note: if this effect appears many times, consider one packed noise texture instead of multiple samples.
Pan the two noise layers in different directions or rotate one layer around the center. The motion should be slow enough to feel alive, not so fast that it becomes screen noise.
Multiply the animated noise by the body mask, then use contrast controls to decide how dense the energy feels. A Power node is simple; SmoothStep is easier to art-direct.
Use a cool outer color and a hotter inner color. The center can receive an emission multiplier, but keep a separate global intensity so the effect can be balanced per level.
Do not blindly use the same value for color and opacity. You may want a soft transparent edge with a strong emissive center. Separate alpha makes the material easier to tune.
05
06
float2 centeredUV = UV - 0.5;
float radius = length(centeredUV) * 2.0;
float body = 1.0 - smoothstep(Radius, Radius + EdgeSoftness, radius);

float noiseA = NoiseTexture.Sample(Sampler, UV + Time * SpeedA).r;
float noiseB = NoiseTexture.Sample(Sampler, UV * DetailScale - Time * SpeedB).r;

float energy = saturate(body * lerp(noiseA, noiseA * noiseB, DetailBlend));
energy = smoothstep(Threshold, Threshold + Softness, energy);

float core = 1.0 - smoothstep(0.0, CoreSize, radius);
float3 color = lerp(OuterColor, CoreColor, saturate(energy + core));
float3 emissive = color * (energy * Emission + core * CoreEmission);

return float4(emissive, energy * Alpha);
07
Two noise samples are usually fine for a hero effect. For repeated background effects, pack multiple noise channels into one texture, lower resolution, or share the same sample at different UV transforms.
If this is a large screen-space card, overdraw may dominate. Test it over bright and dark backgrounds, and avoid stacking too many soft planes.
Tune the material so it reads without bloom first. Bloom should enhance the core, not hide a weak mask or poor value grouping.
Expose `ChargeAmount`, `CoreIntensity`, and `Radius` as user parameters if this material is driven by spell timing or gameplay state.
08
Add value variation before adding more glow. Check the broad noise layer and make sure the center is not the only bright area.
Your detail noise is too high frequency or too contrasty. Reduce detail strength and let the body mask stay readable.
Increase edge softness or separate alpha falloff from emissive falloff. Energy can glow strongly while fading softly.
Push value contrast first, then emission. A slightly darker outer color can make the core feel brighter without extreme HDR values.